Cool white LEDs in the ground light and step light fixtures. Warm white LEDs are installed elsewhere on the locomotive.
STEP LIGHT AND GROUND LIGHT INSTALLED
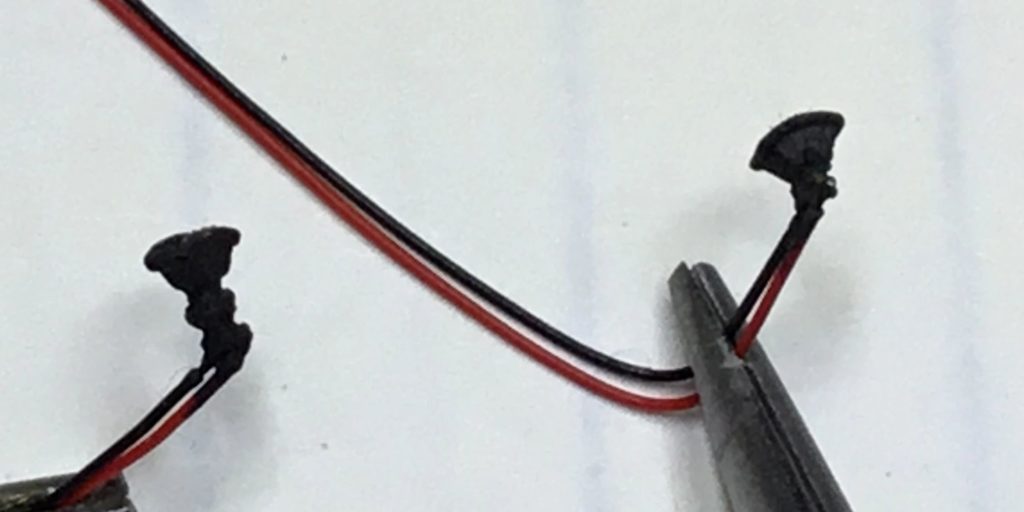
Ground light on the left and Step light on the right. Both are fitted with 0402 LEDs.
At last working ground and step light fixtures that attach to standard LEDs. Assemble yourself or pre-assembled!
Previous
Next
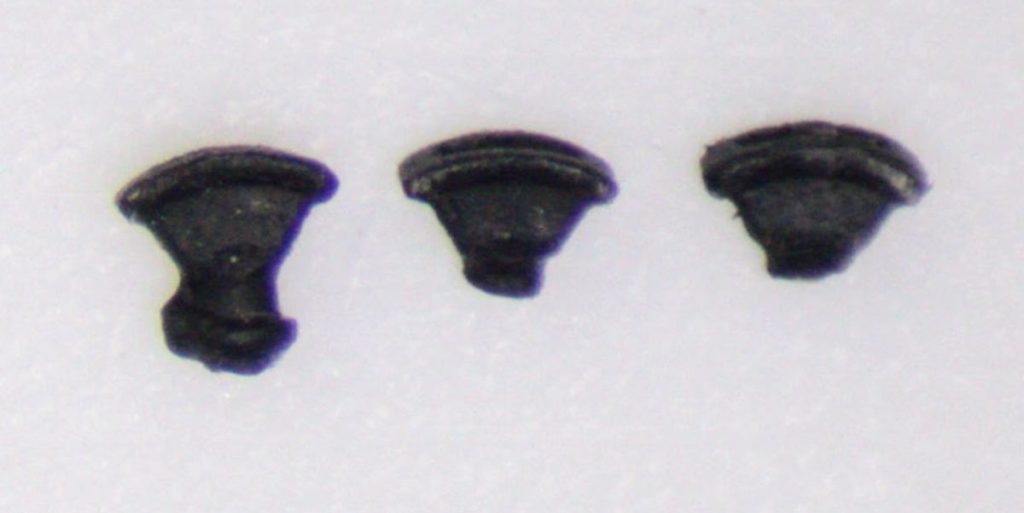
Three different shade variations with fiber optic “bulb”
By cutting the basic casting with sprue nippers or flush cutters the characteristic “shade” can be made to fit different applications.
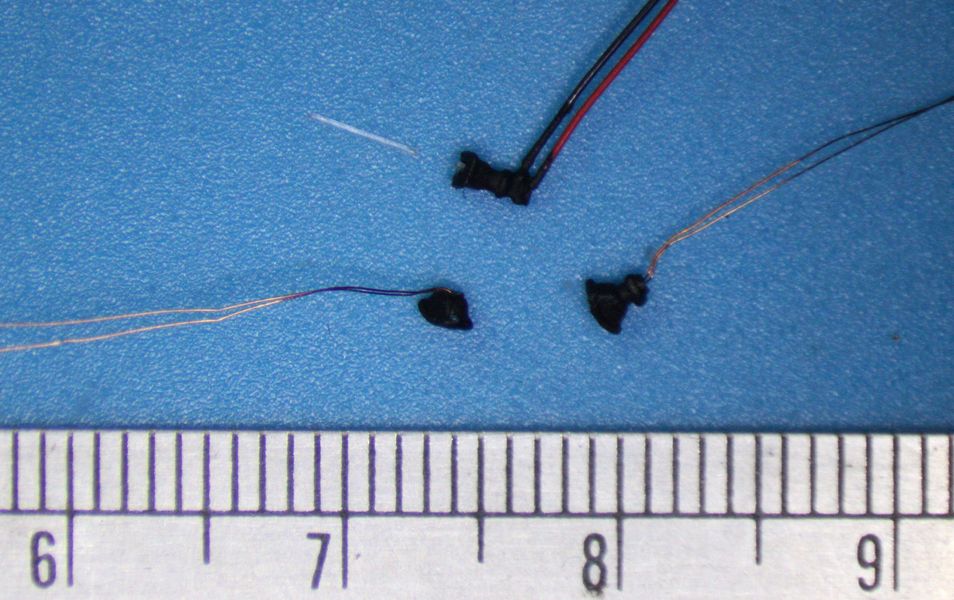
Comparison of 0402 and 0201 Assembly Height
The 0402 on top would represent an ground light attached to a locomotive frame. The two bottom 0201 lights would be more likely be used for steps or high walkway lights. Assemblies may include either 0402 or 0201 LEDs.
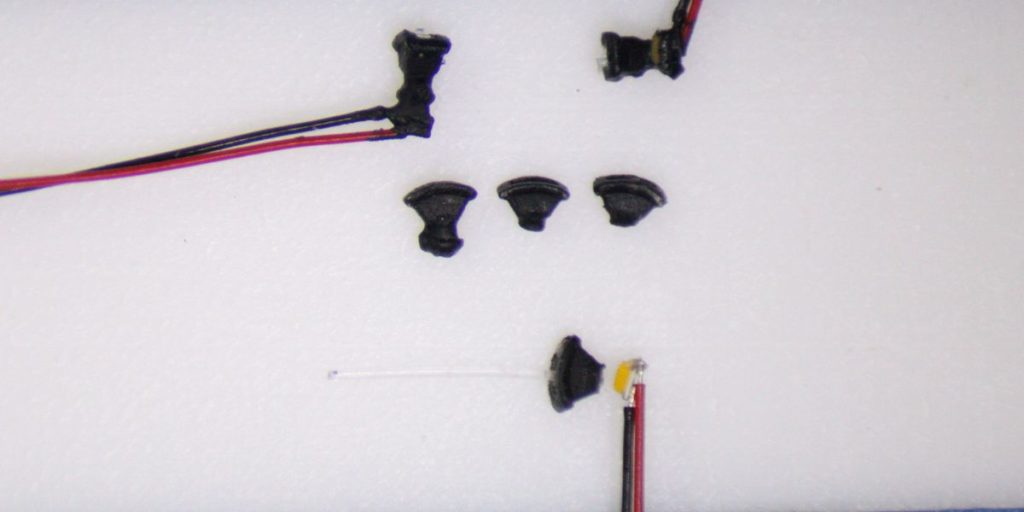
0402 LED Assemblies
0402 LED Assemblies are pictured above. They are a little taller and may well fit in a frame mounting situation better. The 0402 is glued to the bottom of the white painted configurations on the left. The fiber optic is added to look like the bulb most often visible in the ground lights
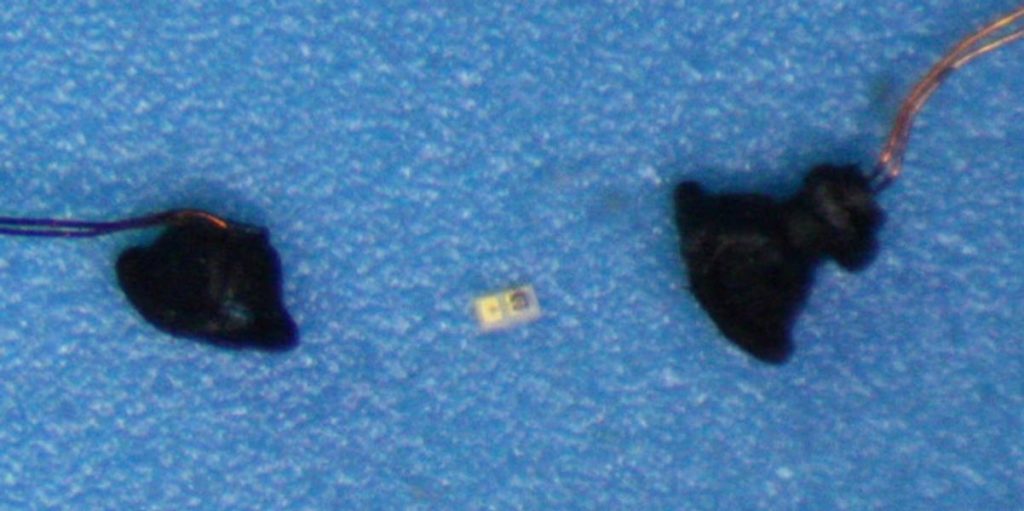
0201 LED Assemblies
0201 LED Assemblies are pictured above. They are a little shorter and may well fit in a step and high walkway mounting situation better. The 0201 LED that is fitted into the shade is shown between the two assemblies.
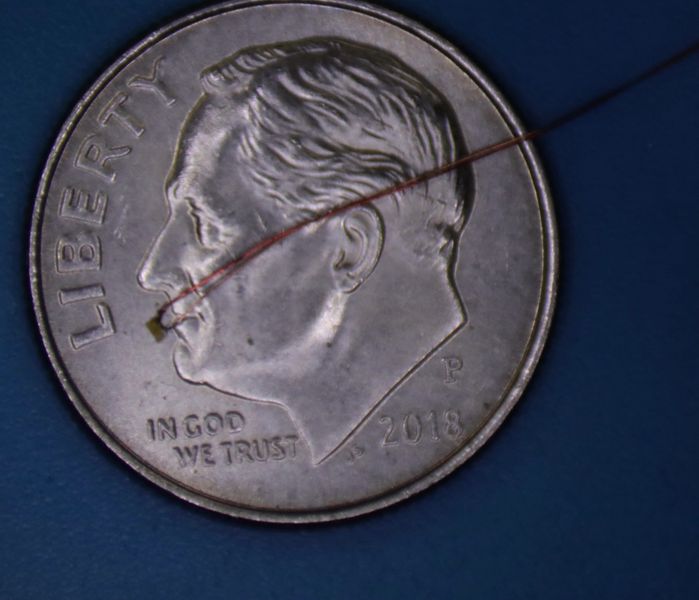
0201 w/ leads on a US Dime
The 0402 LED is larger and glues to the bottom of the fixture and looks like an electrical box. The 0201 fits into the fixture and the wires thread through and exit the bottom of the fixture. The attached wires can be either 38 gauge or 40 gauge magnet wire.
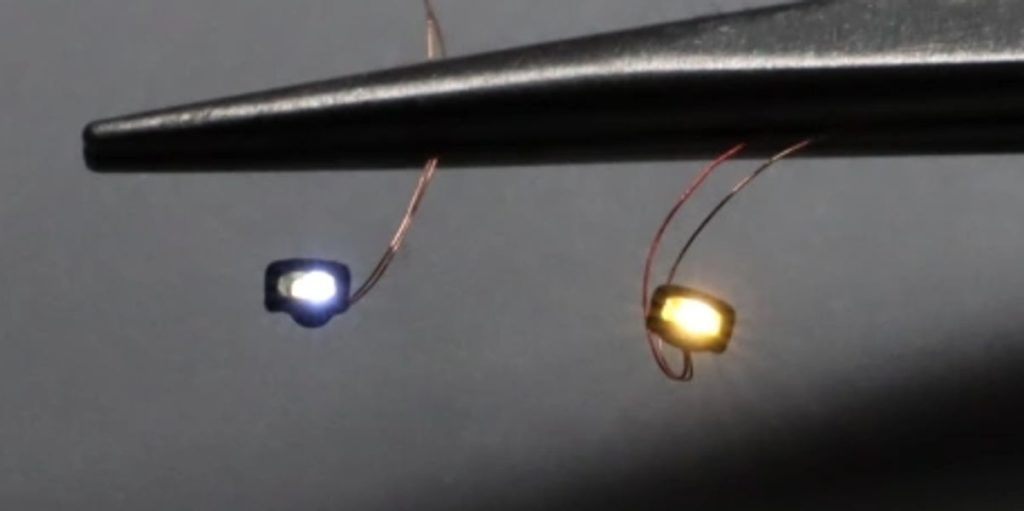
Two shades of white 0201 LEDs
The 0201 LEDs come in two colors also. One is a cool white and the other is a warm white. The two whites approximate the LEDS on the latest locomotives and the warm white approximate the incandescent lights on older locomotives.
A Procedure for Assembly of Ground and Step Lights
Assembly Instructions with 0402 LEDs
This is the procedure I’ve worked out so far. It may well modify itself with time. So far I’ve made a couple hundred finished fixtures. Your input is appreciated too!
The light bulb side of the fixture is pointing up from the sprue. If desired, test fit the fiber optic into the fixture. You may or may not need to clean out the hole through the fixture with a #80 drill. The hole is 0.0135” and the fiber optic strand is 0.010”. Lately I’ve been dipping the end of the fiber optic strand into a pool of CA then pushing it down through the hole in the fixture. This fixes the two parts as they will be assembled as well as makes the fixture a little more manageable. Cut the fixture from the sprue. I’ve started to use a sharp knife to make this separation as clean as possible. Alternatively, insert the fiber optic strand now so it extends past the end of the base of the fixture slightly. In the past when some of the fixtures have broken off I’ve found its possible to shave off the bit of sprue when holding the fixture between thumb and forefinger with minimal loss of blood…. Trim the bottom of the fixture to the desired length. For this a flush cutter, sprue nipper or sharp knife leaves a good surface for a joint. I prefer cyanoacrylate (CA) to attach the fixture to the LED. Carefully dip the bottom of the fixture into a drop of CA, touch it to a dry spot to remove the excess then place on the LED. Hold in position on the LED until stable. If I had more hands now would be a good time for a kicker to accelerate the bond. After the CA has had time to cure it is time to cut the fiber optic strand from the lighting end of the fixture. The next step is to paint it black or opaque where the light is not wanted. I am using cheap Walmart acrylic craft paint at the moment. I’ve found that a second coat of paint is necessary to stop all the unwanted light from escaping. I test for light leaks with a 9 volt battery which has a 1K resistor in line attached while adding the second coat of paint. Allow the paint to dry thoroughly.
I would attach the assembly to the locomotive with GOO, rubber cement or your preference for possible removal in the future. I generally hold routed wires in place with GOO or rubber cement. When supplied, the 0402 warm white LEDs are standard color coding for connection to power. If the light is too blue or purple a little Tamiya Clear Orange might warm up the color. A number of the prototype locomotives I’ve photographed lately are using LED bulbs so color to your taste…
It has been brought to my attention that Bob Smith Industries accelerator may cause the resin printed fixtures to disintegrate. Beware of this phenomina.
I’ll post further tips on the website as they become known.
Enjoy!
Previous
Next
How to set up unknown LEDs
Paul at learnelectronics is a superb instructor. He walks us through the basics of LEDs and gives a basis for making our LEDs briighter or dimmer with resistors. We are using about 12 volts and all his thoughts apply very well. The resistor method and the decoder‘s pwm method in combination can give us a specific brightness that does not “flicker” when you are making videos. He also explains very well that a little less current results in longer LED life. Thanks Paul for your explanation